
Landscape lighting power load planning is the process of calculating and managing the total electrical demand of your outdoor lighting system before a single fixture goes in the ground. Done correctly, it determines the right transformer size, wire gauge, and circuit layout to keep your property safe, code-compliant, and beautifully lit. Skip this step and you risk tripped breakers, dimming fixtures, and violations of the National Electrical Code. This guide walks you through every calculation and decision, from your first fixture count to final transformer selection.
What is landscape lighting power load planning?
Landscape lighting power load planning is the electrical design process that matches your fixture demand to your transformer capacity and wiring layout. The industry term for this discipline is electrical load calculation, and it governs every low-voltage outdoor lighting installation covered under NEC Article 411. The goal is simple: know exactly how much power your system draws, then size every component to handle that draw safely and consistently.
Most homeowners think about lighting design in terms of aesthetics. Load planning is the structural foundation underneath that design. Without it, a beautiful layout can still fail electrically. Fixtures dim at the end of long runs, transformers overheat, and circuits exceed legal limits. Power load planning belongs in the earliest stage of your design, not as an afterthought once fixtures are already purchased.

How do you calculate total load for landscape lighting?
The calculation starts with one critical distinction: LED fixtures require you to work in Volt-Amperes (VA), not watts. LEDs have a power factor often around 0.7 or lower, which means they draw more apparent power from the circuit than their wattage label suggests. VA calculations for LEDs prevent transformer undersizing and circuit overload.
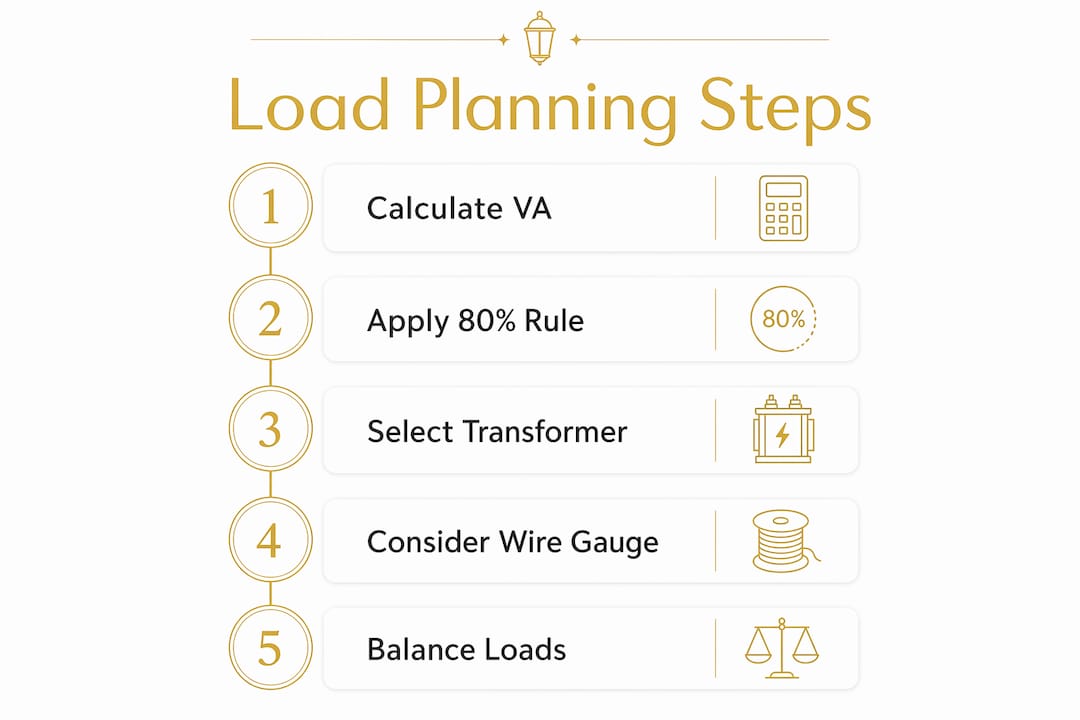
Here is the step-by-step process:
- List every fixture in your planned system with its labeled wattage.
- Calculate VA per fixture using the formula: VA = Watts ÷ Power Factor. If the power factor is unknown, use 0.7 as the default.
- Total all fixture VAs across your system or per zone.
- Check against NEC Article 411 limits. The secondary circuit is capped at a maximum of 25 amperes on 12V systems, which equals 300 watts. Exceeding this creates a code violation.
- Group fixtures into zones so no single branch approaches that ceiling.
Here is a quick example. You have 10 LED path lights at 5 watts each. Total watts = 50W. At a power factor of 0.7, total VA = 50 ÷ 0.7 = approximately 71.4 VA. Add a 20-watt spotlight: 20 ÷ 0.7 = 28.6 VA. Your system total is roughly 100 VA. That number is what you bring to transformer selection.
Pro Tip: Always calculate in VA, not watts, even if your fixtures list only wattage. Using raw wattage for LED systems routinely produces undersized transformers that run hot and fail early.
Why does the 80% rule matter for transformer sizing?
The 80% rule is not a suggestion. It is a legal requirement with two independent origins. NEC 210.20(A) limits continuous load on the primary side to 80% of the circuit's rated capacity. UL 1838 applies a thermal derating on the secondary side that produces the same 80% ceiling. Both must be satisfied simultaneously to avoid fire hazards and premature equipment failure.
The formula is straightforward:
Minimum Transformer VA = Total System VA ÷ 0.80
Using the 100 VA example from above: 100 ÷ 0.80 = 125 VA minimum transformer rating. You would select the next standard size up, typically a 150 VA or 200 VA unit.
Here is why this matters in practice:
- A transformer running at 100% of its rated capacity generates excess heat continuously.
- That heat degrades internal components and shortens the transformer's service life significantly.
- A transformer running at 80% capacity stays within its thermal comfort zone and lasts far longer.
The 80% load rule also gives you room to add fixtures later without immediately violating code. A 300 VA transformer with 240 VA of load sits at exactly 80%, leaving zero headroom. A 400 VA transformer with the same load sits at 60%, giving you space to grow.
Pro Tip: Always select the next standard transformer size above your calculated minimum. The cost difference between a 300 VA and 400 VA unit is small. The cost of replacing an overloaded transformer is not.
How does wire gauge affect voltage drop in your system?
Voltage drop is the reduction in electrical pressure that occurs as current travels along a wire. The longer the run and the thinner the wire, the greater the drop. NEC recommends a maximum 3% voltage drop on branch circuits, with combined feeder and branch drop not exceeding 5%. In practical terms, voltage at the fixture should stay above 10–11V on a 12V system.
The voltage drop formula is: VD = 2 × L × I × R, where L is the one-way wire length in feet, I is the current in amperes, and R is the wire's resistance per foot. You do not need to run this manually every time, but understanding it explains why wire gauge is so consequential.
Here is how common gauges compare for typical residential runs:
| Wire Gauge | Max Recommended Run | Notes |
|---|---|---|
| 12 AWG copper | Up to 100 feet | Industry standard for most residential designs |
| 14 AWG copper | Up to 50–60 feet | Acceptable for short runs only |
| 16 AWG copper | Up to 30 feet | Insufficient for most landscape applications |
| 10 AWG copper | Over 100 feet | Used for long runs or high-load zones |
Professional installers favor 12 AWG copper for nearly all residential landscape lighting runs, including short ones. The reason is simple: a system designed at 12 AWG has built-in tolerance for future fixture additions and run extensions without requiring a rewire.
Two wiring layouts also affect voltage drop significantly. A straight-line layout runs fixtures in series along one cable, which means fixtures at the far end of the run receive less voltage than those near the transformer. A hub-and-spoke layout runs individual cables from a central junction point to each fixture or small cluster. Hub-and-spoke produces more consistent voltage across all fixtures and is the preferred method for high-end installations.
Pro Tip: If fixtures at the end of a run look dim, the fix is rarely a bigger transformer. Reducing load per branch or shortening the run with a hub-and-spoke layout solves the problem far more effectively.
What are the best strategies for balancing your lighting load?
A well-planned system divides fixtures into multiple smaller branches rather than loading everything onto one long cable. Splitting into balanced branches reduces voltage drop effects and prevents any single zone from approaching the NEC 25A secondary limit.
Here are the most effective strategies for balanced load distribution:
- Divide by zone, not just by fixture count. Group fixtures that serve the same area, such as a driveway, garden bed, or pool surround, onto their own branch. This makes future adjustments easier and keeps load balanced.
- Position the transformer centrally. Placing the transformer at the midpoint of your property rather than at one end shortens the average run length to each zone, reducing voltage drop across the board.
- Use transformer taps. Most quality transformers include multiple voltage taps (12V, 13V, 14V). Select a higher tap for longer runs to compensate for expected voltage drop and keep fixture voltage in the 10–12V range.
- Leave 20% capacity unused at installation. This is not just the 80% rule applied to the transformer. Apply the same logic to each branch. A branch loaded to 80% of its practical capacity leaves room for one or two additional fixtures without rewiring.
- Plan conduit paths during construction. If your property is under any renovation, run conduit now. Retrofitting wire paths through finished hardscape is expensive and disruptive.
The most common mistake homeowners make is treating the transformer as the only variable. When fixtures dim, the instinct is to buy a larger transformer. Increasing transformer size alone does not resolve voltage drop at the end of long runs. The wire gauge and run length are the controlling factors. Addressing those first saves money and produces better results.
One more safety note: low-voltage landscape cable requires only a 6-inch burial depth, but the transformer's primary side connection to household current requires GFCI protection as mandated by NEC 411.4(A). This is a non-negotiable safety requirement, not an optional upgrade.
Key takeaways
Correct landscape lighting power load planning requires calculating total VA load, applying the 80% transformer rule, and selecting wire gauge based on run length to maintain safe, code-compliant illumination.
| Point | Details |
|---|---|
| Calculate in VA, not watts | LED power factors around 0.7 mean VA always exceeds wattage; use VA for accurate transformer sizing. |
| Apply the 80% rule | Divide total system VA by 0.80 to find the minimum transformer rating required by NEC and UL 1838. |
| Respect the 25A circuit limit | NEC Article 411 caps 12V secondary circuits at 25 amperes; exceeding this creates code violations. |
| Choose 12 AWG wire | Twelve-gauge copper handles most residential runs up to 100 feet and accommodates future expansion. |
| Split into balanced branches | Multiple smaller zones reduce voltage drop more effectively than upgrading to a larger transformer. |
Load planning is where good lighting starts
I have reviewed a lot of landscape lighting projects that looked stunning in the design phase and struggled badly after installation. The pattern is almost always the same: the electrical side was treated as a detail to sort out later. It never is.
The misconception I see most often is that a bigger transformer fixes everything. Homeowners buy a 600 VA unit when a 300 VA would have been correct, assume they have headroom, and then wonder why fixtures at the far end of a 120-foot run still look dim. The transformer is not the problem. The wire gauge and run length are. A correctly sized transformer paired with properly gauged wire and a hub-and-spoke layout will outperform an oversized transformer on a poorly planned straight-line run every single time.
I also want to be direct about DIY limits. Calculating VA loads and selecting transformer taps is genuinely manageable for a careful homeowner. The primary side connection, meaning the 120V household circuit feeding your transformer, is a different matter. Mixing line-voltage and low-voltage requirements in DIY setups is one of the most common sources of unsafe and noncompliant installations. That connection requires a licensed electrician and GFCI protection. Everything else in this guide you can plan yourself with confidence.
Start your load calculation before you buy a single fixture. It will tell you exactly what transformer you need, how to route your wire, and how much room you have to grow. That clarity makes the entire installation cleaner, safer, and more satisfying.
— Chris
Let Elegantoutdoorlights handle the calculations for you
Planning a landscape lighting system for a large estate or complex property is a different challenge than a simple front-yard path light setup. Elegantoutdoorlights designs every landscape lighting installation with full load calculations, transformer sizing, and wire routing completed before a single fixture is placed. Serving Bel Air, Beverly Hills, Pacific Palisades, and Malibu, the team brings professional-grade electrical planning to every project, so your system performs beautifully from day one and scales gracefully as your property evolves.

If your project involves multiple zones, long cable runs, or a mix of fixture types, the margin for error in DIY load planning shrinks fast. Elegantoutdoorlights offers custom design consultations that cover every electrical detail, from NEC compliance to transformer tap selection. Visit elegantoutdoorlights.com to start your consultation and get a system designed to perform as well as it looks.
FAQ
What is landscape lighting power load planning?
Landscape lighting power load planning is the process of calculating the total VA electrical demand of all outdoor fixtures and sizing the transformer, wiring, and circuits to handle that load safely and within NEC code requirements.
How do i calculate VA for my landscape lighting system?
Divide each fixture's wattage by its power factor (use 0.7 as the default for LEDs), then add all fixture VAs together to get your total system load before selecting a transformer.
What size transformer do i need for landscape lighting?
Divide your total system VA by 0.80 to find the minimum transformer rating, then select the next standard size up. A 240 VA system requires at least a 300 VA transformer under NEC 210.20(A) and UL 1838.
Why are my landscape lights dim at the end of the run?
Dimness at the far end of a run is caused by voltage drop, not an undersized transformer. Shortening the run, increasing wire gauge to 12 AWG, or switching to a hub-and-spoke layout resolves the issue more effectively than upgrading the transformer.
What wire gauge is best for landscape lighting?
Twelve-gauge copper wire is the industry standard for most residential landscape lighting runs up to 100 feet. Fourteen-gauge is acceptable for runs under 50–60 feet, but 12 AWG provides better long-term performance and expansion capacity.