
TL;DR:
- A holiday lighting walkthrough is a professional on-site assessment that maps electrical loads, mounting points, and visitor pathways for safe, beautiful displays. It is best scheduled in mid to late October to allow time for planning, ordering, and installation. Proper dusk evaluations ensure the designer sees how lighting interacts with the landscape, improving safety and visual impact.
A holiday lighting walkthrough is a professional, on-site assessment used to plan safe and visually stunning holiday light displays on residential estates. During this evaluation, a lighting designer maps electrical loads, identifies mounting points, and documents the visitor journey across the property. The process typically lasts 30–60 minutes for residential estates and covers architecture, landscape features, and power infrastructure. For homeowners and estate managers in Bel Air, Beverly Hills, and Pacific Palisades, a professional holiday lighting assessment is the foundation of every successful installation.
What is a holiday lighting walkthrough and what does it cover?
A holiday lighting walkthrough is the industry term for a structured, pre-installation site survey conducted by a professional lighting designer. It is not a casual look around the property. It is a methodical evaluation that produces a documented plan covering design, electrical capacity, and installation logistics before a single strand of lights goes up.

The walkthrough serves three core functions. First, it defines the visual design by identifying the architectural and landscape features worth highlighting. Second, it maps the electrical infrastructure to confirm the property can safely power the planned display. Third, it documents the visitor experience by tracing the path a guest would walk from the street to the front door and beyond.
Circuit overloads are a primary cause of failures in high-end holiday lighting displays. A walkthrough catches those risks before installation day, saving time, money, and the frustration of a display that trips breakers nightly.
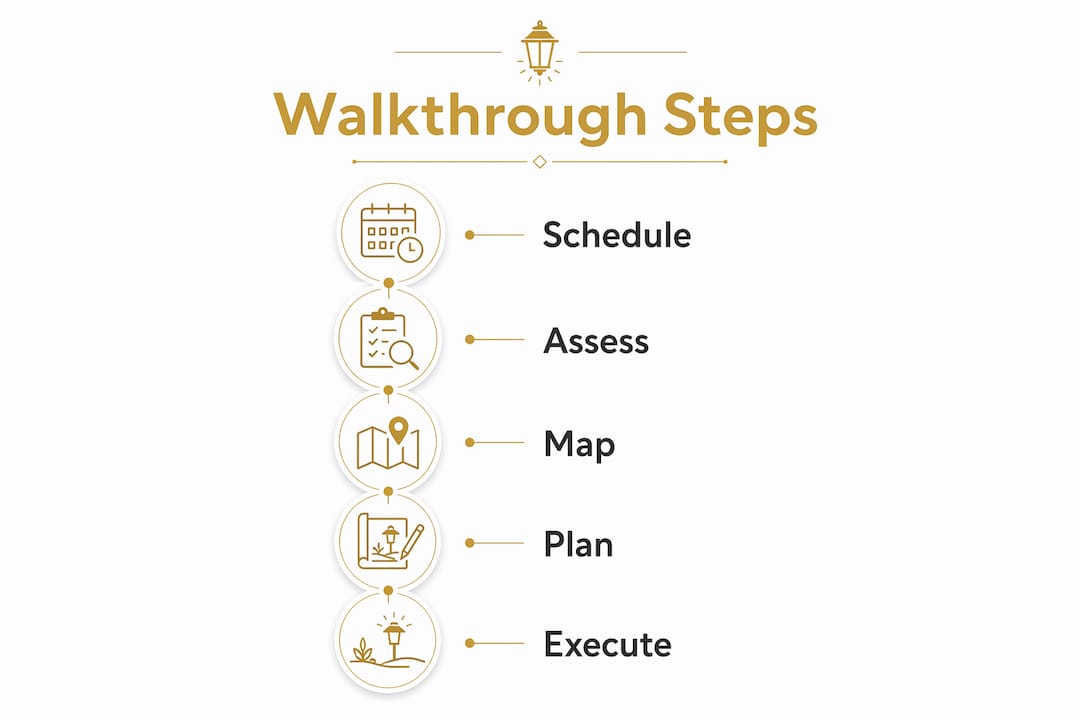
What are the key steps in a holiday lighting walkthrough?
A thorough walkthrough follows a clear sequence. Skipping any step creates gaps in the plan that show up as problems during installation or, worse, on the night of the first event.
-
Measure rooflines and architectural features. The designer measures the linear footage of rooflines, eaves, columns, and window frames. Standard bulb spacing of 12 inches per bulb is the baseline for calculating how many lights each run requires. Accurate measurements prevent under-ordering and mid-project delays.
-
Map power supply zones. The designer locates every GFCI-protected outlet on the exterior of the property and records its position relative to the planned display zones. This step also includes evaluating the electrical panel capacity to confirm the total load the display will draw.
-
Assess mounting points and focal features. Roofline clips, tree anchors, column wraps, and ground stakes all require specific mounting hardware. The designer notes the surface material, height, and access requirements for each point.
-
Document the visitor journey. The designer walks the property as a guest would, from the street entrance through the driveway, along pathways, and to the main entry. This traces the sequence of visual moments a visitor experiences and identifies where lighting will have the greatest impact.
-
Record installer pathways. The designer maps the routes installers will use to access rooflines and trees. Documenting installer paths protects mature landscaping and irrigation systems from accidental damage during installation.
Pro Tip: Bring a measuring wheel and a circuit tester to every walkthrough. Eyeballing footage and assuming outlet capacity are the two fastest ways to blow a budget on installation day.
How does design integration enhance the holiday lighting walkthrough process?
The goal of the walkthrough is not just to count outlets and measure rooflines. The deeper purpose is to establish a cohesive narrative experience that treats the entire estate as a single canvas rather than a collection of isolated lit elements. A row of lights on a roofline and a wrapped palm tree are not a design. A sequence of visual moments that guides a visitor through the property is.
Layered lighting is the technique that separates a memorable display from a forgettable one. Effective walkway lighting goes beyond path edging by layering light at multiple vertical levels for depth and visual interest. In practice, this means:
- Overhead arches and canopy lighting create a sense of arrival and enclosure along driveways and entry paths.
- Mid-level wraps on trees, columns, and shrubs add warmth and fill the visual space between the ground and the roofline.
- Ground-level accents such as pathway stakes, uplights, and orbs anchor the display and guide foot traffic safely.
Dusk is the only time to evaluate a property for lighting design accurately. Daytime visits miss the nuances of glare and hot spots that are critical for a successful result. A designer who walks the property at dusk can see exactly how existing landscape lighting interacts with shadows, which surfaces reflect light well, and where fixtures will create unwanted glare.
"Proper visitor journey mapping can double user-generated content and engagement on holiday displays." Walkthrough assessments for large or interactive displays also evaluate photo-op placements to increase social media engagement and create moments guests want to share.
Accessibility is another design consideration that walkthroughs address. Evaluating pathways for mobility-impaired visitors ensures the display is welcoming to all guests and avoids liability issues on private estates that host events.
What are critical electrical and safety considerations during a holiday lighting walkthrough?
Electrical planning is as essential as aesthetic design. A display that causes breaker trips nightly is a failure, regardless of how beautiful it looks. The walkthrough is the moment to get the electrical plan right.
| Electrical Factor | What to Evaluate | Why It Matters |
|---|---|---|
| GFCI outlet locations | Map all exterior GFCI outlets and their circuit assignments | Prevents tripped breakers and protects against ground faults |
| Circuit load capacity | Calculate total wattage of planned display per circuit | Avoids overloads that damage equipment and create fire risk |
| Voltage drop | Measure cable run lengths from outlet to fixture | Long runs cause dim or flickering lights at the end of the strand |
| Cable routing | Plan conduit paths along structures, not across open ground | Reduces trip hazards and protects cables from foot traffic |
| Installer pathways | Document access routes to rooflines and elevated features | Protects irrigation lines, root zones, and planted beds |
Failing to map existing power sources and verify GFCI capacity leads to dim or flickering lights due to voltage drops across sprawling estates. On a large property in Malibu or Bel Air, a single circuit may need to power a 200-foot driveway run. Without voltage drop calculations, the lights at the far end of that run will be noticeably dimmer than those near the outlet.
A well-documented electrical plan ensures consistent brightness, safety, and reduces last-minute costly fixes during installation. The plan should specify load zones, cable routing, and the type of connector used at each junction point.
Pro Tip: Always plan for 80% of a circuit's rated capacity, not 100%. That 20% buffer is what keeps a display running safely through a cold December night when guests are arriving and every outlet on the property is in use.
How to apply walkthrough insights for installation planning and design ideas
The walkthrough produces a documented plan. That plan is the tool you use to move from concept to installation without surprises. Here is how to put it to work:
-
Build an accurate budget from measurements. Linear footage measurements and outlet maps translate directly into quantities of lights, extension cables, clips, and mounting hardware. Procurement based on real measurements eliminates waste and prevents shortages.
-
Select light types based on site conditions. Commercial-grade LED lights are the standard for estate-scale displays because they draw less power per foot than incandescent options, which matters when you are running long circuits. The walkthrough's electrical data tells you exactly how much load you have to work with on each circuit.
-
Coordinate installer workflow from the mapped pathways. The installer path documentation from the walkthrough becomes the crew's site plan on installation day. Crews know which trees receive which light types, which routes to use for roofline access, and where to stage equipment without damaging the grounds.
-
Time the installation before the high season. The most successful holiday lighting installations begin with a design walkthrough held in mid to late october. That schedule provides time to order custom materials, schedule crews, and complete installation before the weather turns and the social calendar fills up. Rushing an estate-scale installation in late november produces a result that reflects the rush.
-
Use the visitor journey map to sequence the reveal. The documented visitor path tells you which lighting elements a guest sees first, second, and third. Use that sequence to build anticipation. The grandest element of the display should be the last thing a visitor sees, not the first.
For design inspiration before your walkthrough, reviewing outdoor Christmas light styles gives you a vocabulary for communicating your vision to the designer on site.
Key takeaways
A holiday lighting walkthrough is the single most important step in planning a safe, beautiful, and well-executed estate holiday display.
| Point | Details |
|---|---|
| Define the walkthrough early | Schedule your site assessment in mid to late october to allow time for custom orders and crew scheduling. |
| Map electrical capacity first | Verify GFCI outlet locations and circuit load limits before finalizing any design plan. |
| Layer lighting at three levels | Combine overhead arches, mid-level wraps, and ground-level accents for a display with depth and visual impact. |
| Conduct the walkthrough at dusk | Dusk reveals glare, hot spots, and shadow interactions that a daytime visit will miss entirely. |
| Document everything | Measurements, electrical plans, and installer pathways all reduce cost and risk on installation day. |
Why the walkthrough is the most undervalued hour in holiday lighting
Most estate managers I speak with have experienced at least one holiday lighting installation that did not go as planned. Lights that flickered, breakers that tripped on the night of a party, or a display that looked impressive in a proposal but underwhelming in person. In nearly every case, the root cause was a walkthrough that was skipped, rushed, or treated as a formality.
The walkthrough is not overhead. It is the work. Every measurement taken, every outlet mapped, and every installer pathway documented on that site visit is an hour of problem-solving that does not happen at 9 PM on a December evening when guests are arriving. I have seen a single dusk walkthrough catch a voltage drop issue that would have required re-running 300 feet of cable mid-installation. That one hour saved two days of rework.
The other mistake I see consistently is treating design and electrical planning as separate conversations. They are the same conversation. The moment you commit to wrapping a 40-foot oak tree in LED net lights, you have made an electrical decision. The walkthrough is where those two disciplines meet, and that intersection is where the best displays are born.
If you are managing a property in Beverly Hills or Pacific Palisades and you are planning a display for the 2026 season, start with the walkthrough. Everything else follows from it. For a deeper look at how architectural lighting design principles apply to large estates, that resource is worth your time before the site visit.
— Chris
Elegant Outdoor Lights: estate-scale holiday lighting, designed from the ground up
Elegant Outdoor Lights specializes in luxury holiday lighting installations for distinguished estates across Los Angeles, including Bel Air, Beverly Hills, Pacific Palisades, and Malibu. Every project begins with a detailed on-site walkthrough conducted at dusk, covering electrical load mapping, architectural feature assessment, and visitor journey planning.

The result is a display that is safe, structurally sound, and visually exceptional. From commercial-grade LED installations to full estate holiday designs with custom arches and landscape wraps, Elegant Outdoor Lights delivers a white-glove experience from the first site visit through removal and storage. Contact Elegant Outdoor Lights to schedule your holiday lighting consultation and begin planning your 2026 display today.
FAQ
What is a holiday lighting walkthrough?
A holiday lighting walkthrough is a professional, on-site site assessment that maps electrical loads, mounting points, and visitor pathways to plan a safe and visually effective holiday light display. It typically lasts 30–60 minutes for residential estates.
When should I schedule a holiday lighting walkthrough?
The best time to schedule a walkthrough is mid to late october. That timing allows for custom material orders, crew scheduling, and installation completion before the peak holiday season.
Why is a dusk walkthrough important for holiday lighting design?
Daytime visits miss glare, hot spots, and shadow interactions that only appear at low light. A dusk walkthrough lets the designer see exactly how light will interact with the property's architecture and landscaping.
What electrical factors does a holiday lighting walkthrough assess?
A walkthrough evaluates GFCI outlet locations, circuit load capacity, voltage drop over long cable runs, and cable routing paths. These factors determine how many lights each circuit can safely power and where cables must be routed.
How does a walkthrough improve the final holiday lighting installation?
Documented measurements and electrical plans eliminate guesswork on installation day, reduce costly mid-project fixes, and protect mature landscaping by mapping installer pathways in advance.