TL;DR:
- Pool area lighting uses layered LED fixtures to enhance safety, ambiance, and energy efficiency. Proper design emphasizes fixture placement, depth, and color temperature while avoiding glare and mismatched lighting. Layering ambient, task, and accent lights creates a safe, attractive outdoor space that feels cohesive and looks visually appealing at night.
Pool area lighting design is the art of illuminating outdoor pools and surrounding spaces to serve three goals at once: safety, ambiance, and energy efficiency. A well-executed plan uses layered fixture types, precise placement, and modern LED technology to make your pool usable and beautiful after dark. This pool area lighting design guide covers everything from fixture ratings and color temperature to spacing rules and smart controls, giving you a clear framework for creating a luminous outdoor space that works as hard as it looks.
What types of fixtures work best for pool area lighting?
LED fixtures are the industry standard for outdoor pool lighting in 2026. LED lighting uses up to 90% less energy than halogen or incandescent alternatives and lasts over 50,000 hours. That longevity means fewer replacements and lower long-term maintenance costs.
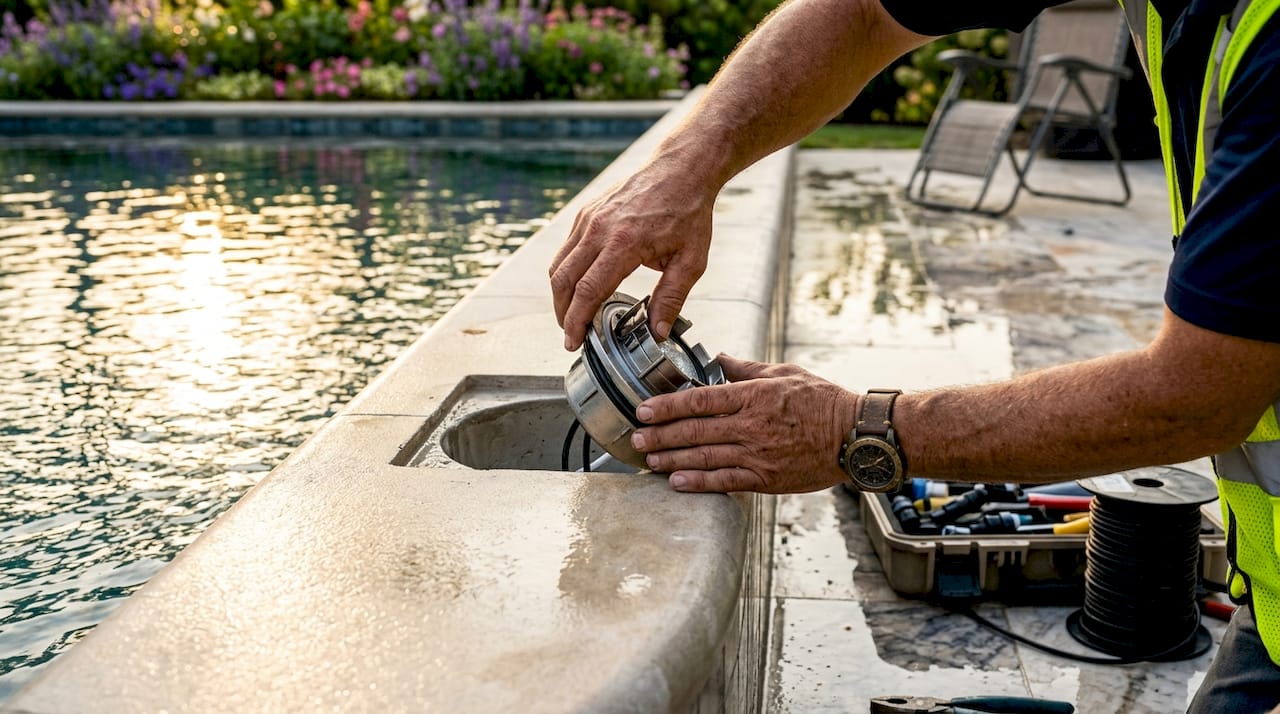
Safety ratings matter as much as efficiency. Low-voltage 12V LED systems with IP67 ratings are required for deck and perimeter fixtures, while submerged lights need IP68 certification. These ratings confirm that fixtures can handle full water immersion without failure. Skipping this standard is a safety risk, not just a code violation.
Color temperature shapes how your pool looks at night. A 2700K–3000K warm white complements natural stone, greenery, and hardscape without making the water look artificial or clinical. Cooler temperatures above 4000K tend to feel harsh and industrial in residential settings.
The main fixture categories for a complete pool lighting plan include:
- Nicheless LED pool lights: Flush-mounted underwater fixtures that eliminate the traditional niche housing, reducing maintenance access points
- Path lights: Low-profile fixtures along walkways and pool perimeters that guide foot traffic safely
- Step lights: Recessed or surface-mounted fixtures on pool stairs and raised decking edges
- Accent lights: Directional spotlights aimed at trees, walls, or water features surrounding the pool
- Hardscape lights: Fixtures embedded in retaining walls, coping, or raised planters
- Underwater accent lights: Colored or white fixtures that illuminate water features like fountains and waterfalls from below
Fixture materials determine how long your investment lasts. Brass, powder-coated aluminum, and composite housings resist corrosion from pool chemicals, saltwater, and UV exposure. Plastic housings degrade quickly in direct sun and chemical-rich environments.
Pro Tip: Avoid mixing color temperatures across fixture types. A warm 2700K underwater light paired with a 5000K path light creates a jarring contrast that undermines the entire design.
How many lights do you need and where should they go?
Fixture quantity and placement are the most misunderstood parts of any lighting design for pools. The general rule is one nicheless LED light every 8 feet along the pool wall for consistent illumination without dark spots. That spacing is a starting point, not a fixed formula.
Pool shape, finish color, and water features all shift the math. Light finishes reflect more light and need fewer fixtures, while dark finishes absorb light and require additional fixtures to compensate. A dark-bottom pool with a complex freeform shape may need 30–40% more fixtures than a simple rectangular pool with a white plaster finish.
Depth-based placement is equally critical. Lights in deep pools should sit 18–24 inches below the waterline, while shallow-end fixtures work best at 9–12 inches. Tanning shelves need fixtures placed just 4 inches below the surface. Placing lights too shallow in deep water creates hot spots; placing them too deep in shallow water wastes output.
| Pool area | Recommended depth below waterline | Spacing guideline |
|---|---|---|
| Deep end (over 5 ft) | 18–24 inches | Every 8 ft along wall |
| Shallow end (under 5 ft) | 9–12 inches | Every 8 ft along wall |
| Tanning shelf | 4 inches | One per shelf section |
| Spa | 9–12 inches | One per 6–8 ft of wall |
| Perimeter path lights | N/A (surface) | Every 6–8 ft along edge |
| Step lights | N/A (surface) | One per tread |
Orientation matters as much as depth. Lights should be aimed away from homes and seating areas to prevent glare from ruining the nighttime experience. Glare directed at guests impairs both safety and enjoyment. The goal is to illuminate the water and surrounding surfaces, not the eyes of the people using the space.
Pro Tip: Use multiple lower-wattage fixtures instead of fewer high-wattage ones. Spreading output across more points eliminates hot spots and dark corners far more effectively than relying on a handful of powerful lights.
What are the best design principles for layering pool lighting?
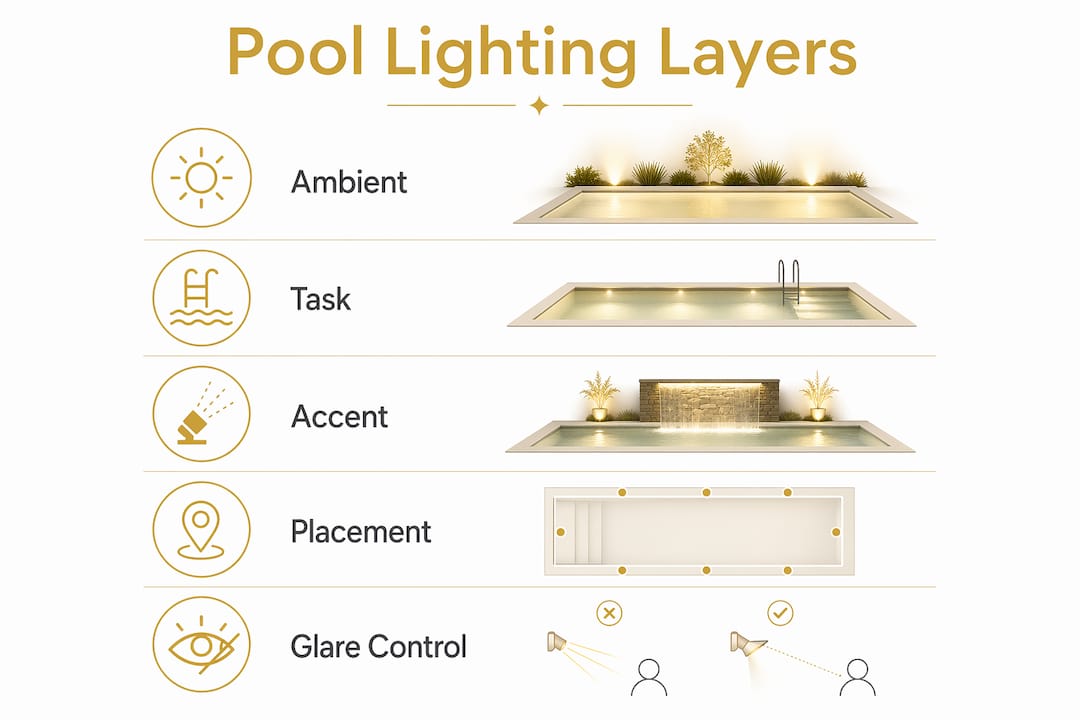
Layering ambient, task, and accent lighting is the defining principle of high-end pool area design. Each layer serves a distinct purpose, and the combination produces depth, safety, and visual interest that a single fixture type cannot achieve alone.
The three layers work like this:
- Ambient lighting covers the broad perimeter. Path lights along walkways and low-level fixtures around the pool deck give guests enough light to move safely without creating a floodlit effect.
- Task lighting targets specific functional zones. Step lights on pool stairs, entry points, and raised deck edges prevent trips and falls. These fixtures need to be bright enough to define edges clearly.
- Accent lighting adds drama and personality. Spotlights aimed at palm trees, specimen plants, water features, and architectural walls create focal points that draw the eye and give the space a finished, designed quality.
Water features deserve special attention within the accent layer. Uplighting a waterfall from below highlights the movement of water and creates a dynamic visual effect that changes as the water flows. Fountains lit from multiple angles cast rippling reflections across surrounding surfaces. These effects are what separate a functional pool from a genuinely impressive outdoor space.
A unified lighting plan that treats pool, patio, and landscape as one project avoids the fragmented look that results from treating each area separately. When the color temperature, fixture style, and intensity levels are consistent across zones, the entire property reads as intentional rather than assembled over time.
Glare control is the discipline that holds the layered plan together. Fixtures should illuminate objects, not announce themselves. Burying path lights slightly below grade, using shielded step lights, and aiming underwater fixtures toward the center of the pool rather than toward the walls all reduce visible glare. For a deeper look at how these principles apply across an entire property, the architectural lighting design guide from Elegant Outdoor Lights covers ambient, task, and accent coordination in detail.
What practical steps make pool lighting safe and impressive?
Safe installation starts with the right fixtures and the right system voltage. Every fixture in or around the pool must carry the appropriate IP rating for its location. Running standard line-voltage wiring near a pool is a code violation in most jurisdictions and a genuine safety hazard. Low-voltage 12V systems reduce risk and are far easier to modify as your design evolves.
A reliable installation follows this sequence:
- Plan on paper first. Map the pool shape, note all depth zones, mark water features, and identify walkways, steps, and seating areas before purchasing a single fixture.
- Select fixtures by zone. Match IP ratings, wattage, and color temperature to each specific location rather than buying one fixture type for the entire project.
- Run conduit and wiring before hardscape is finished. Retrofitting wiring through finished coping or pavers is expensive and disruptive.
- Place and aim fixtures before final connections. Test orientation at dusk to confirm glare control and coverage before committing to permanent installation.
- Test the full system at night. Walk every path, sit in every seating area, and swim in the pool to verify that no fixture creates glare or leaves a dark zone.
- Set timers or smart controls. Program lights to activate at dusk and shut off at a set hour to manage energy use without manual switching.
Common mistakes include over-lighting the pool interior while ignoring the perimeter, placing step lights too high on the riser so they shine into guests' eyes, and using mismatched color temperatures across zones. Each of these errors is easy to avoid with a complete plan and a dusk walkthrough before installation is finalized.
"The most common mistake I see is treating pool lighting as an afterthought. Homeowners finish the pool, then try to add lights around it. The result is always a compromise. Lighting integrated from the design phase costs less, looks better, and performs more safely than anything retrofitted after the fact."
Pro Tip: Smart lighting controls let you set different scenes for swimming, entertaining, and quiet evenings. A single app or timer can shift the pool from full brightness to a soft ambient glow without touching a single fixture.
For guidance on keeping your outdoor lighting safe year-round, the outdoor lighting safety tips resource from Elegant Outdoor Lights covers fixture maintenance, electrical safety, and seasonal considerations in practical detail.
Key Takeaways
Effective pool area lighting design requires layering LED fixtures across ambient, task, and accent zones, with placement depth, spacing, and color temperature calibrated to the specific pool and surrounding landscape.
| Point | Details |
|---|---|
| LED fixtures are the standard | LEDs use up to 90% less energy than halogen and last over 50,000 hours. |
| IP ratings are non-negotiable | Use IP67 for deck fixtures and IP68 for any submerged lights. |
| Spacing and depth drive coverage | Place one fixture every 8 ft along pool walls; adjust depth by zone (4–24 inches). |
| Warm white sets the right mood | A 2700K–3000K color temperature flatters water, stone, and greenery naturally. |
| Layering creates the finished look | Combining ambient, task, and accent lighting produces depth, safety, and visual appeal. |
Why I think most pool lighting fails before it starts
Most pool lighting projects fail at the planning stage, not the installation stage. Homeowners select fixtures based on catalog photos taken in controlled studio conditions, then wonder why the finished result looks flat or disconnected from the rest of the property.
The shift that changed everything for me was understanding that pool lighting is landscape lighting first. The pool is one element in a larger composition. When you design the lighting for the pool in isolation, you get a glowing rectangle surrounded by darkness. When you design the lighting for the entire outdoor space and let the pool be the centerpiece, you get something that feels like a resort.
LED technology made this kind of thinking practical. The ability to dial in exact color temperatures, use low-profile nicheless fixtures, and control everything from a phone removed the technical barriers that used to force compromises. The design constraints that remain are almost always about planning, not technology.
The trend toward smart lighting controls is genuinely useful, not just a novelty. Being able to shift from a bright functional scene for evening swimming to a soft ambient glow for a dinner party, without rewiring anything, is a real quality-of-life improvement. But smart controls only work well when the underlying fixture placement and layering are already correct. Technology does not fix a bad plan.
Safety is the foundation that everything else rests on. No amount of beautiful accent lighting compensates for a dark pool step or a glare-producing fixture aimed at a guest's face. Get the safety layer right first, then build the ambiance on top of it.
— Chris
Elegant Outdoor Lights: professional pool area lighting design in Los Angeles
Elegant Outdoor Lights designs and installs custom pool area and landscape lighting for estates across Bel Air, Beverly Hills, Pacific Palisades, and Malibu. Every project is planned at dusk, built around the specific architecture and grounds of the property, and installed with commercial-grade LED fixtures rated for outdoor and wet-location use.

Whether you are starting a new pool project or upgrading an existing lighting system, the team at Elegant Outdoor Lights brings the same white-glove approach to every installation. From fixture selection and placement planning to smart control integration and ongoing maintenance, the full scope of landscape lighting design and installation is handled with precision and care. Contact Elegant Outdoor Lights to schedule a custom design consultation for your property.
FAQ
What is the best color temperature for pool lighting?
The best color temperature for pool lighting is 2700K–3000K warm white. This range enhances the natural tones of water, stone, and surrounding greenery without making the pool look artificial.
How many lights does a pool need?
A standard pool needs one nicheless LED fixture every 8 feet along the pool wall as a baseline. Pool shape, finish color, and water features all affect the final count.
What IP rating do pool lights need?
Deck and perimeter fixtures require IP67, while any fixture submerged in the water requires IP68. These ratings confirm the fixture can handle moisture and full immersion safely.
How deep should underwater pool lights be installed?
Deep-end fixtures should sit 18–24 inches below the waterline, shallow-end fixtures at 9–12 inches, and tanning shelf fixtures at approximately 4 inches below the surface.
What is layered pool lighting?
Layered pool lighting combines ambient lighting for general coverage, task lighting for steps and entry points, and accent lighting for water features and surrounding landscape. The combination produces a safe, visually complete outdoor space.